English
User Guide (T256s)
This guide introduces the hardware interfaces, local touch interactions, UVC data formats (MJPEG / Y16), and storage rules for the T256s. It is designed to help you quickly get started with the device for secondary development or thermal data analysis.
Hardware Interface Description
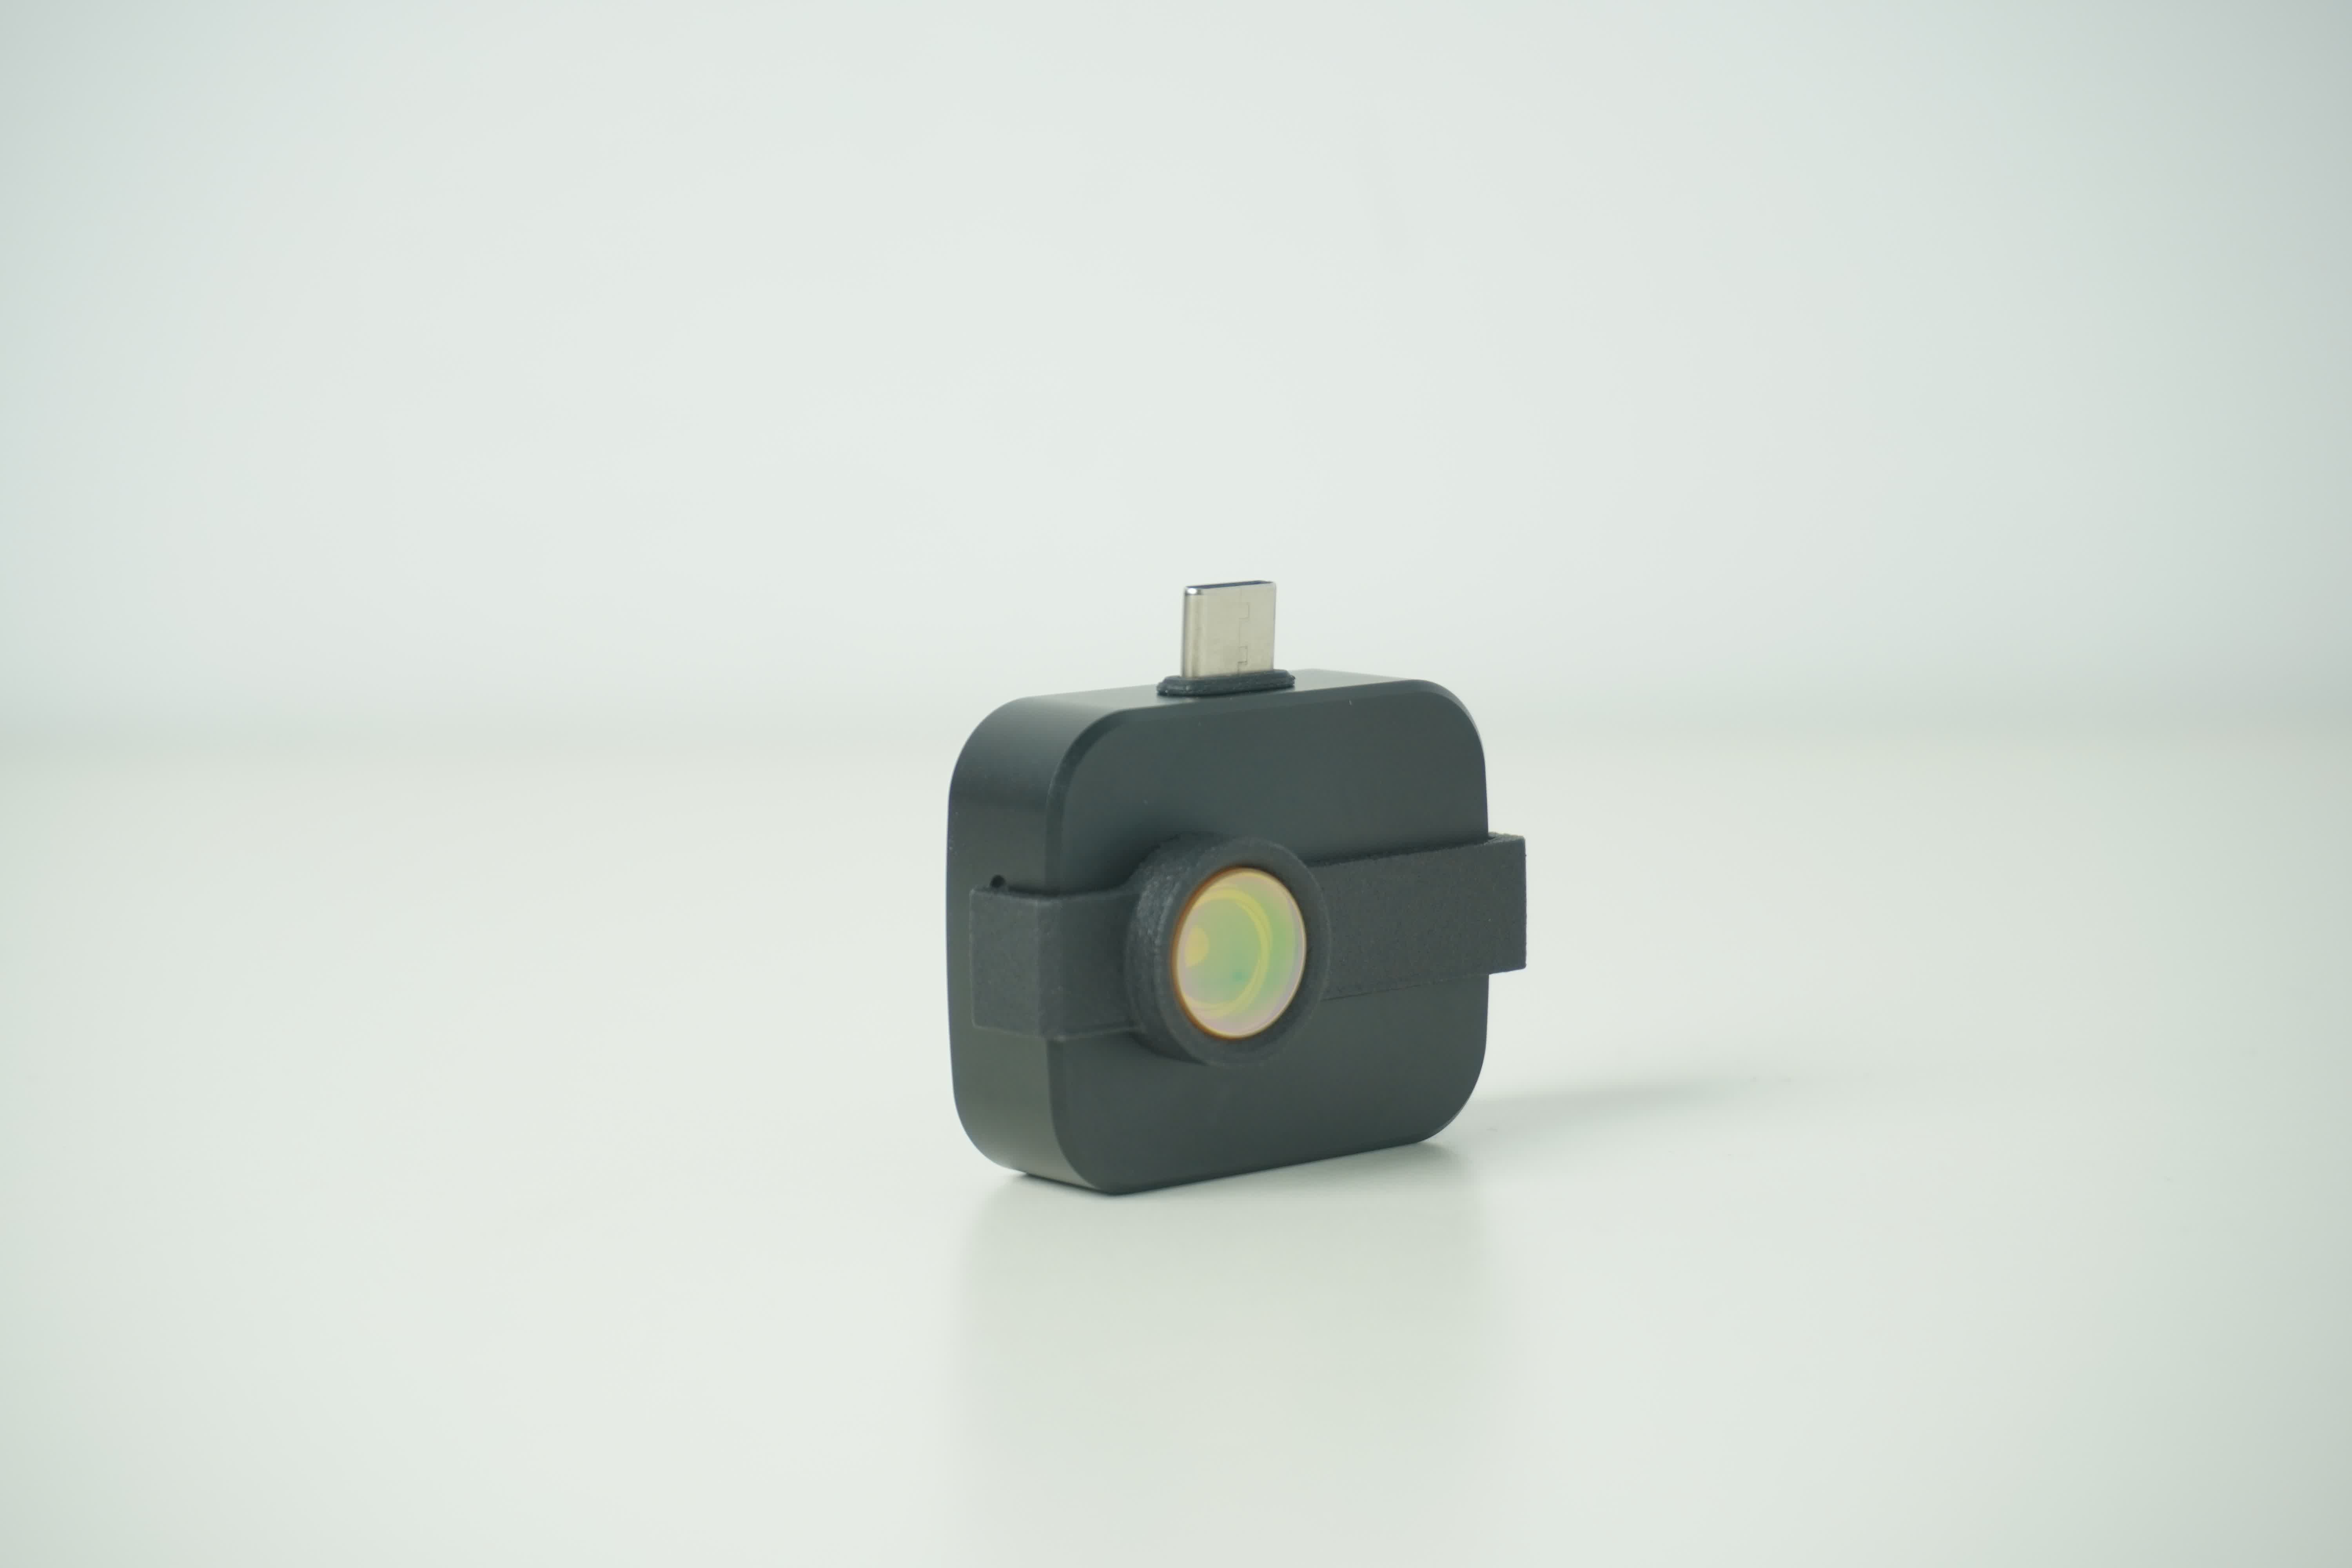
- Type-C Male (Device) Port: Located at the bottom of the unit. Plug this directly into a smartphone for power and data transmission. If the phone does not recognize the device, ensure OTG Power Supply is enabled in the system settings.
- Type-C Female (Host/Power) Port: Located at the top of the unit. Used for connecting to a PC, power bank, or external power cable. This is ideal for long-term monitoring or communicating with PC-side host software.
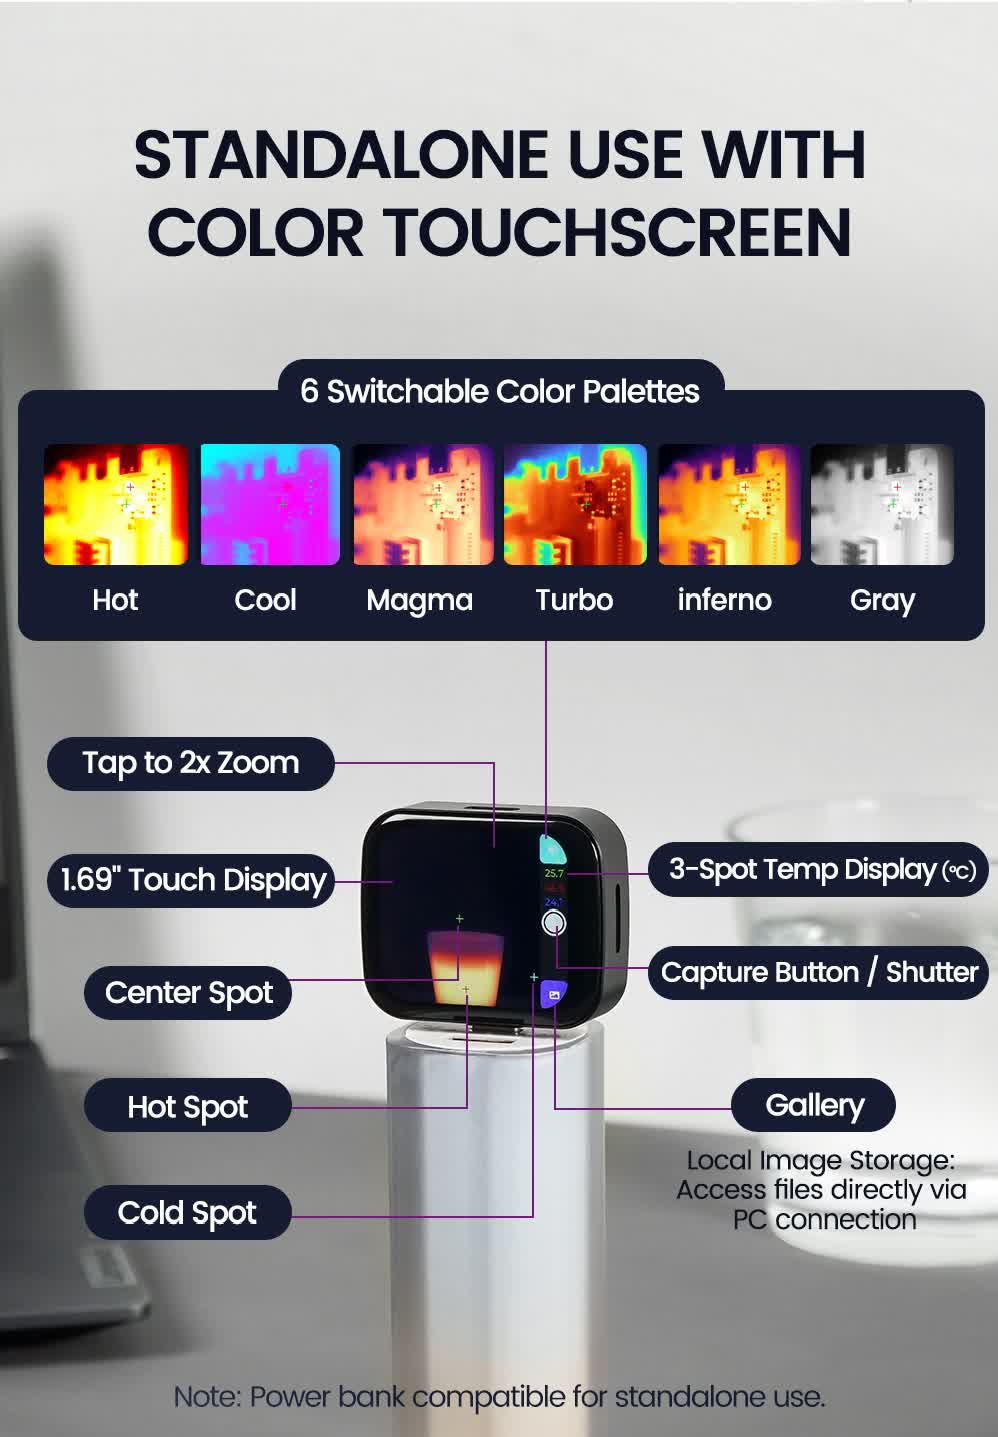
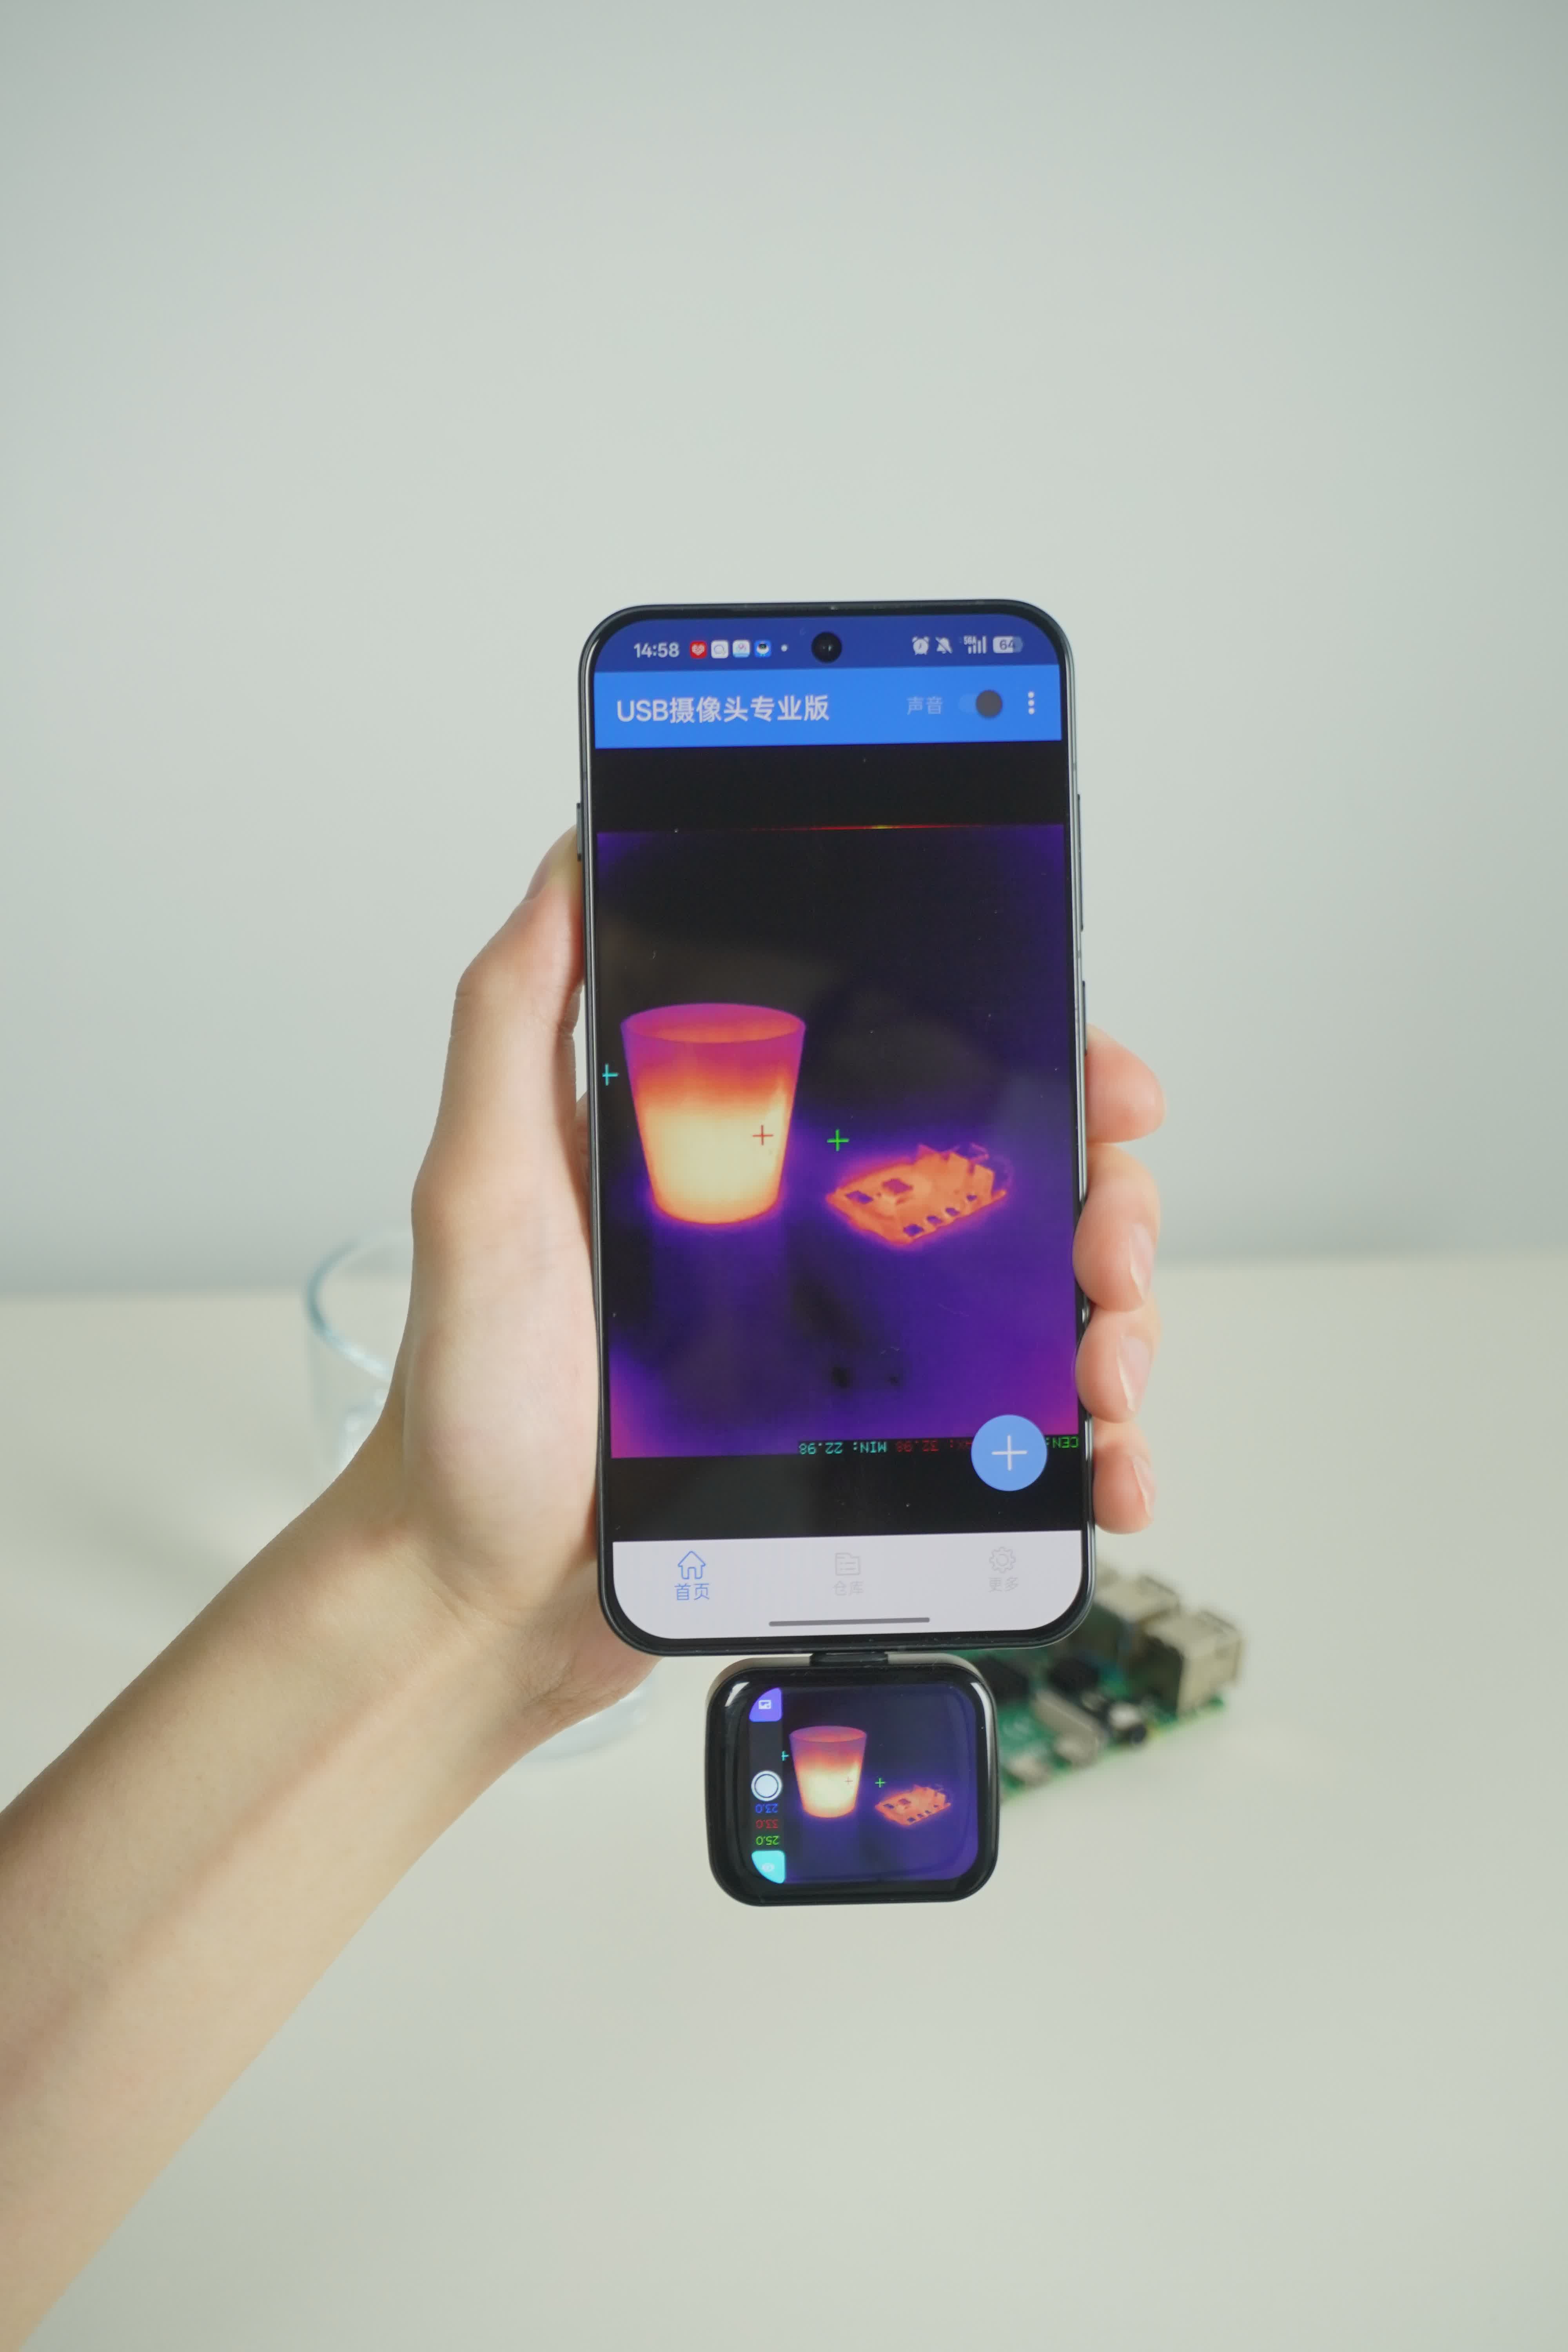
- Touchscreen: A 1.69-inch capacitive touchscreen (240×280) for local interaction and real-time viewing. It offers responsive control and supports multi-touch (depending on firmware version).
- Macro Lens (Optional): Designed for observing small-scale components on PCBs. With a working distance of approximately 5cm, it provides a clear heat distribution map for tiny components like 0402 packages.
Note: Avoid exposing the device to high humidity or strong electromagnetic interference. Prolonged operation in high-temperature environments may degrade temperature measurement accuracy.
Local Touch Interaction (Standalone Mode)
When not connected to a host computer, the T256s functions as a standalone thermal imager. The screen supports the following operations:
- Image Zoom: Tap the center of the screen to toggle quickly between 1x and 2x zoom.
- Temperature Annotation: The system automatically tracks and displays values for the center point, maximum temperature (Hot Spot), and minimum temperature (Cold Spot). The interface defaults to Celsius (°C). A 2-minute warm-up is recommended for optimal accuracy.
- Pseudo-color (Palette) Switching: Tap the color block icon in the upper-right corner to cycle through 6 built-in palettes (e.g., White Hot, Ironbow, Rainbow, etc.). Different palettes suit different scenarios; for instance, "White Hot" is often better for identifying subtle temperature gradients.
- Quick Capture: Tap the camera icon on the right-middle of the screen. The current frame will be saved to internal storage. A confirmation prompt will appear upon a successful save.
- Gallery Preview: Tap the gallery icon in the lower-right corner. Swipe left or right to browse photos, or use the delete button to manage storage space.
UVC Data Formats & Parsing Theory
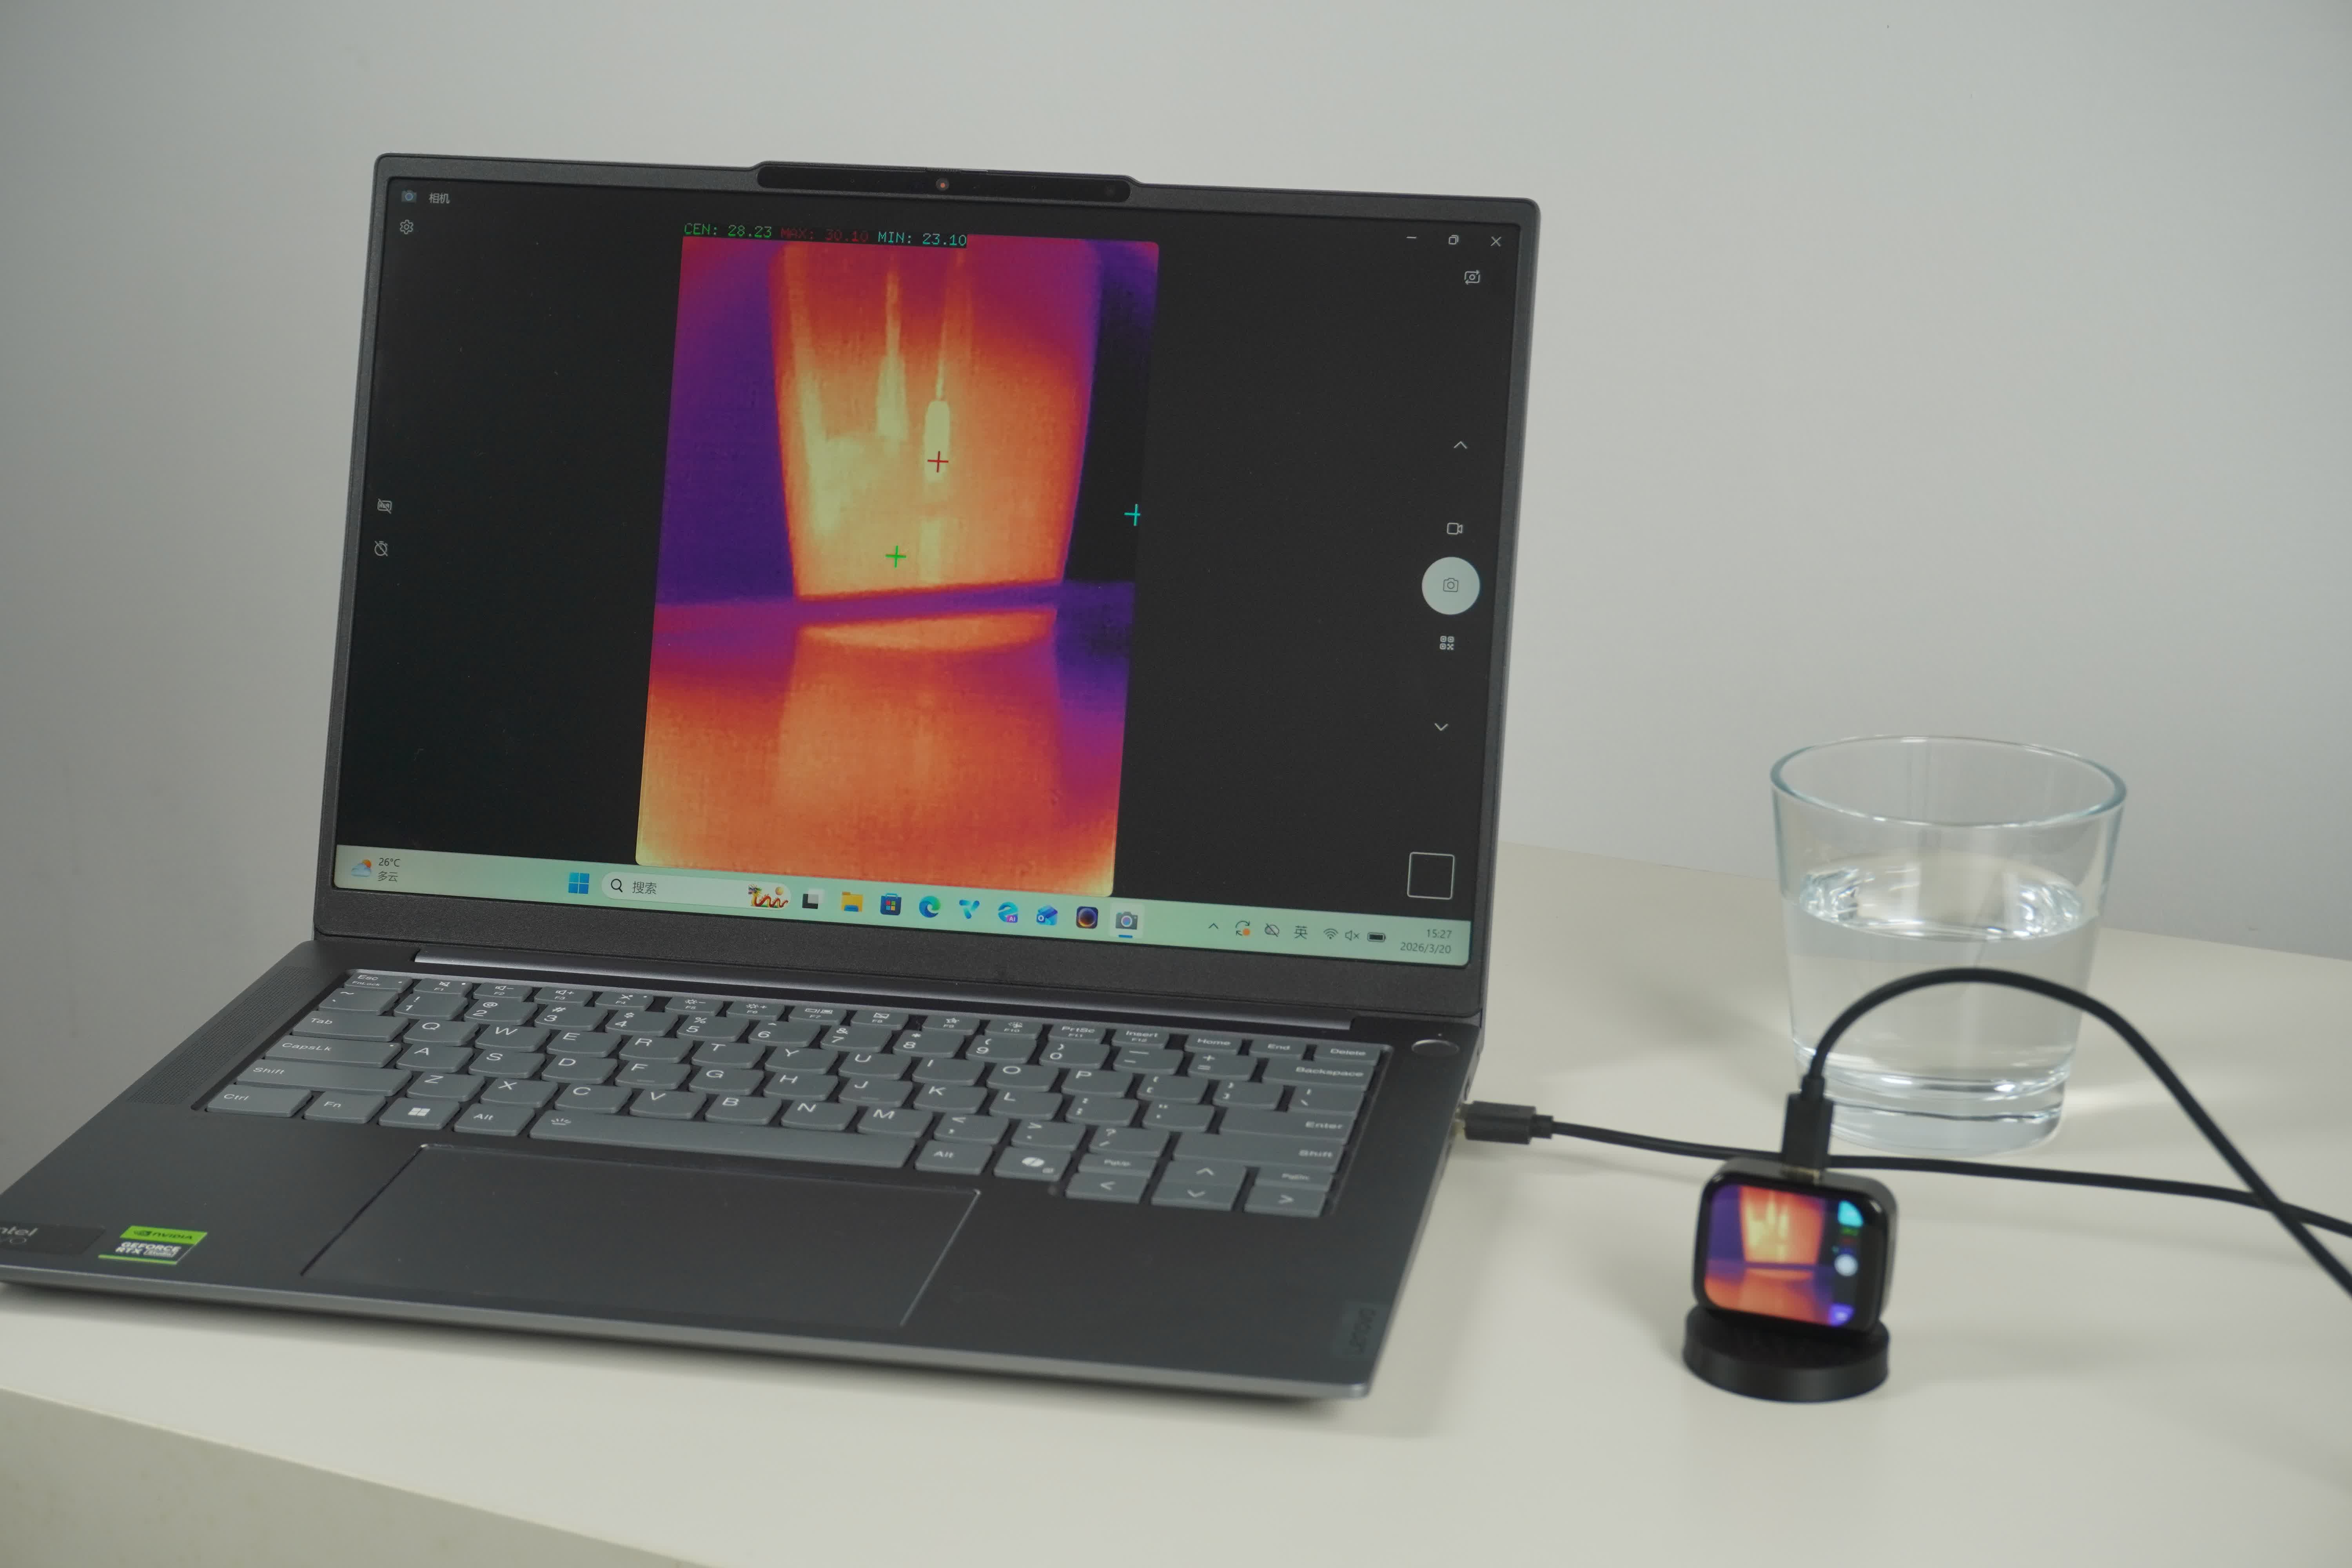
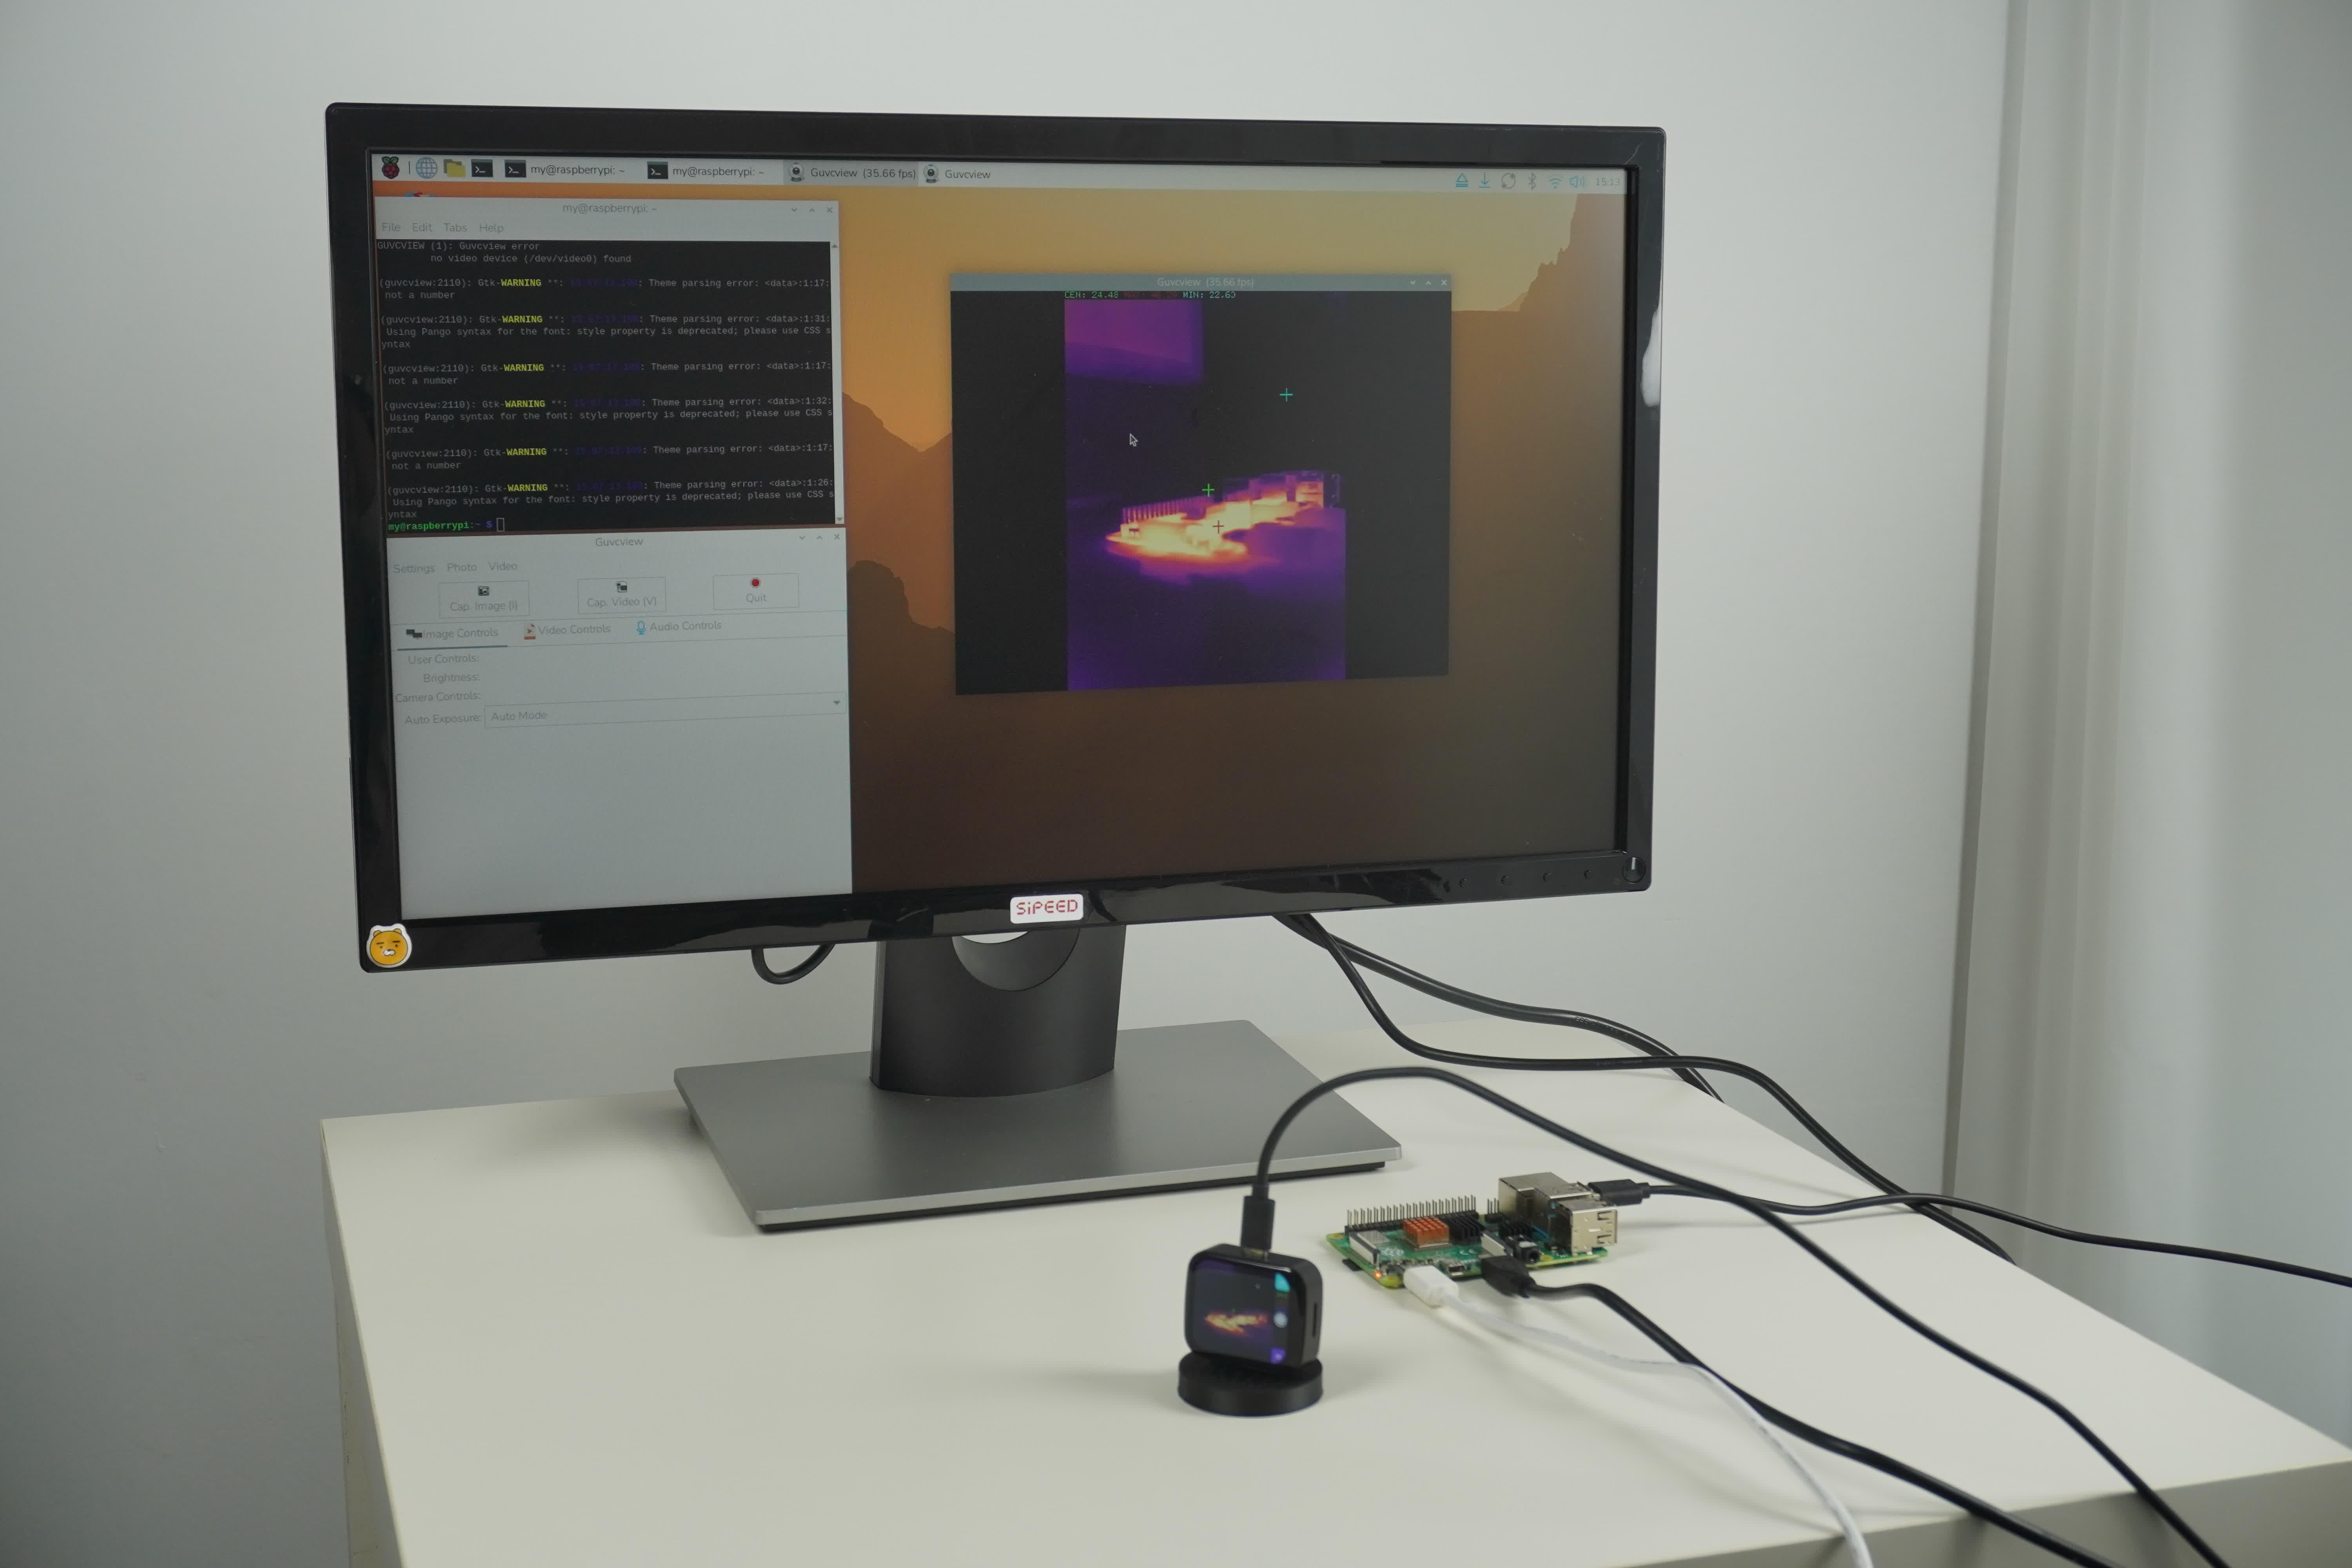
The T256s is UVC-compliant and supports two primary video stream outputs. Choose the appropriate format based on your development needs.Supports iPad, but not iPhone.
MJPEG Format (Preview & Display)
- Purpose: Standard video preview. Compatible with OBS, VLC, or the native Windows Camera app.
- Features: The image is processed with on-device AI Super-Resolution (ISR) for enhanced detail and has the built-in pseudo-color (CMAP) applied. The output resolution is typically 640×480, balancing clarity and fluid frame rates.
- Use Cases: General inspection, remote monitoring, and real-time hotspot observation.
- Limitation: Since the image is converted to a colorized preview, you cannot extract precise temperature values directly from this stream. It is intended for visual representation only.
Y16 Format (Measurement & Analysis)
- Purpose: Essential for precision thermography or developing custom host software. It contains the raw 14-bit pixel data from the sensor.
- Features: Outputs a raw grayscale stream representing the infrared energy intensity captured by the detector. Each frame contains complete thermal information.
- Conversion Logic: To map raw values to temperature, use the following formula. Ensure the device has reached thermal equilibrium (approx. 2 minutes) for accurate readings.
- Formula: $Celsius = (raw\_value / 64.0) - 273.15$
- Example: If the raw value is 22700, the temperature is $\approx 22700 / 64.0 - 273.15 = 81.53$ °C.
- Note: Pixel values in the MJPEG stream are processed and cannot be used with this formula. Use the Y16 raw stream for any quantitative analysis.
Storage & File Access
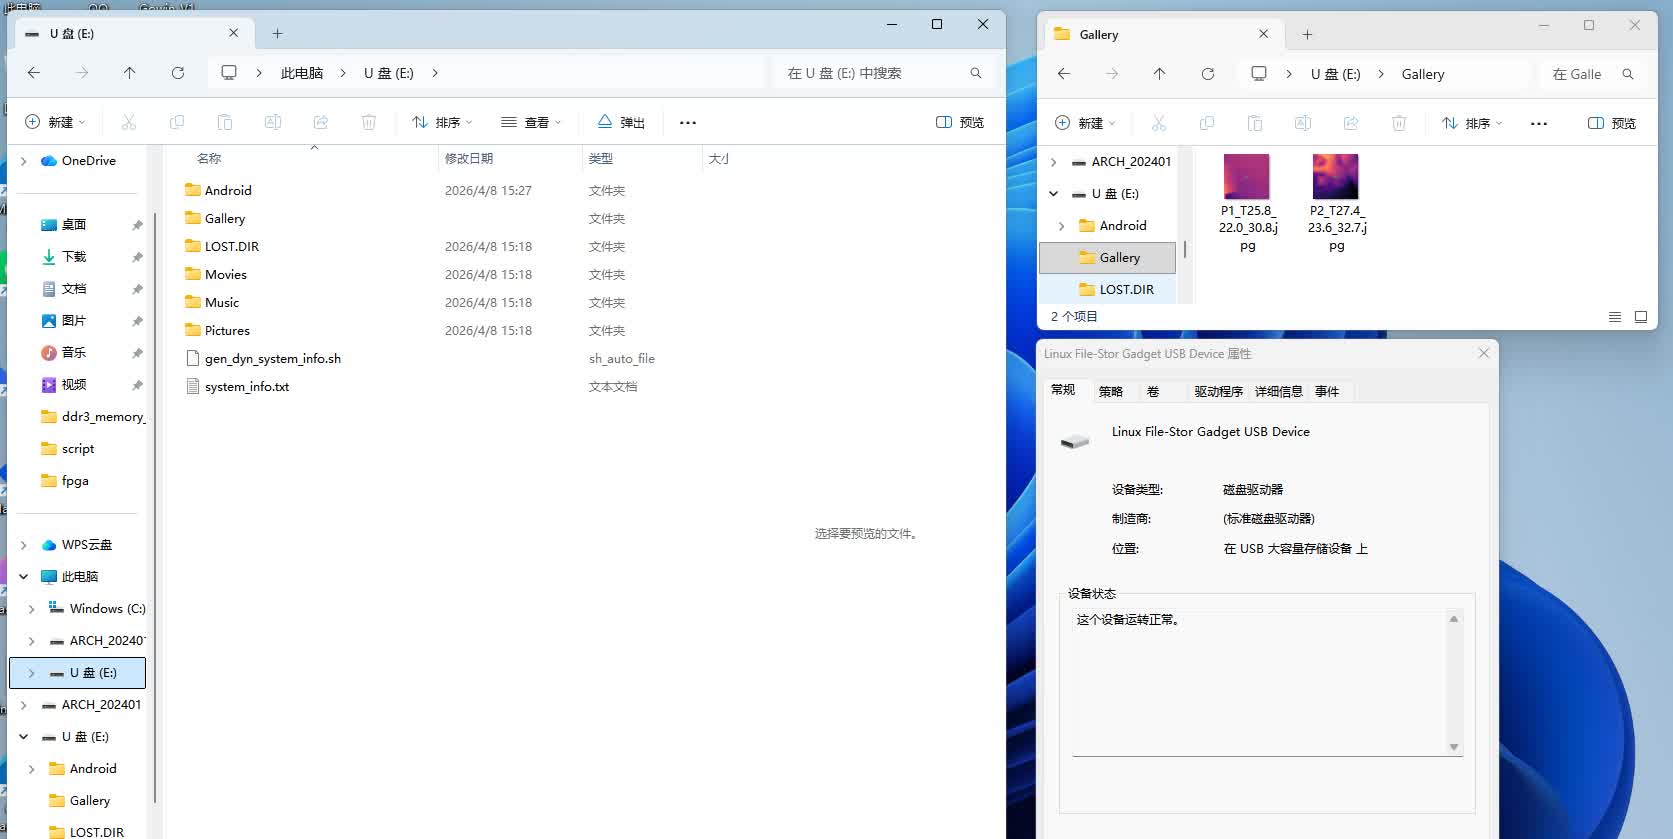
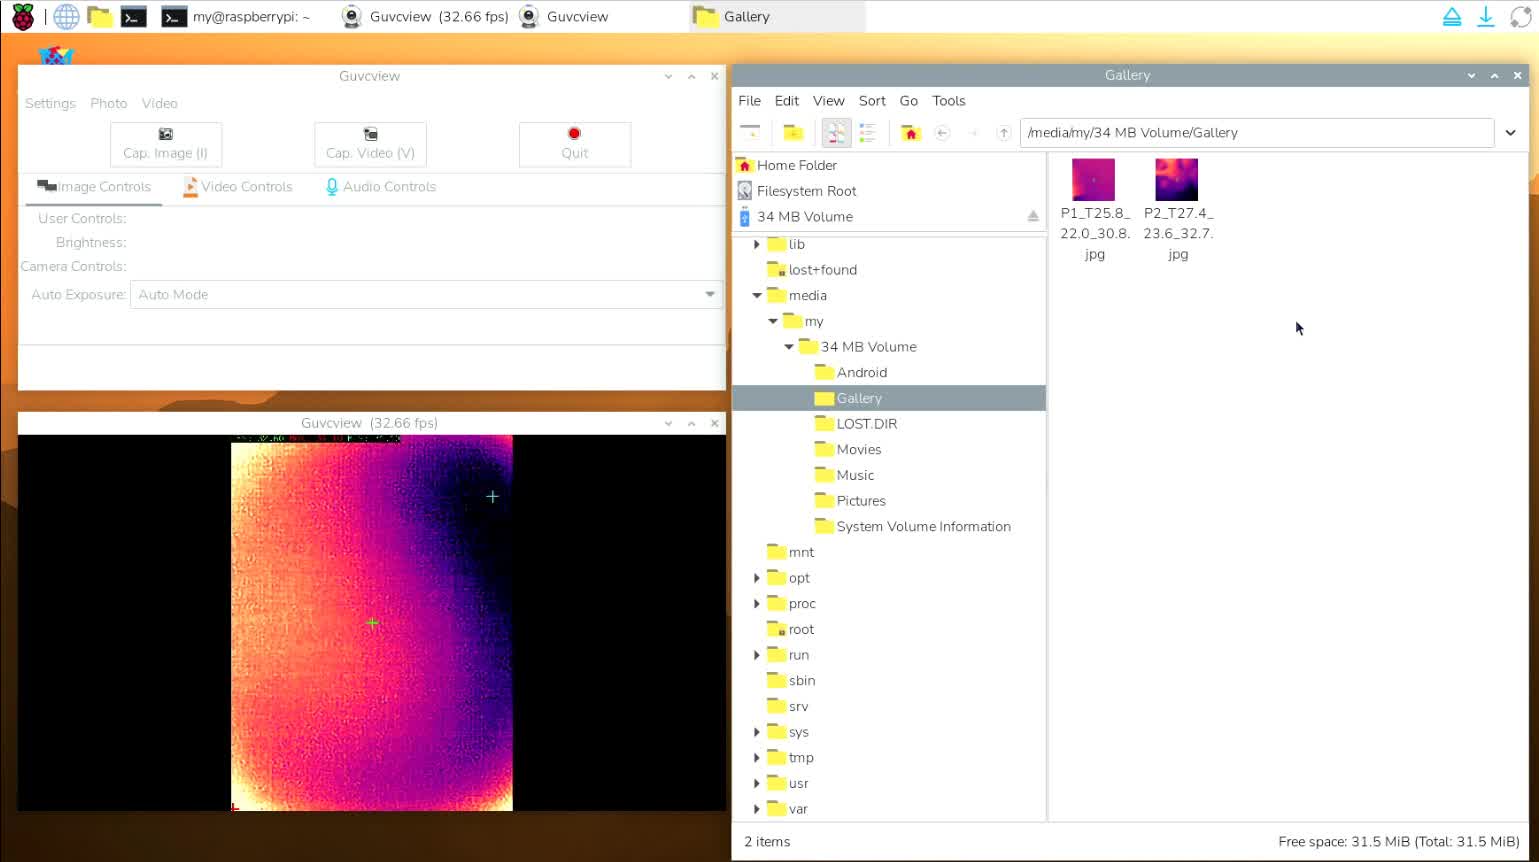
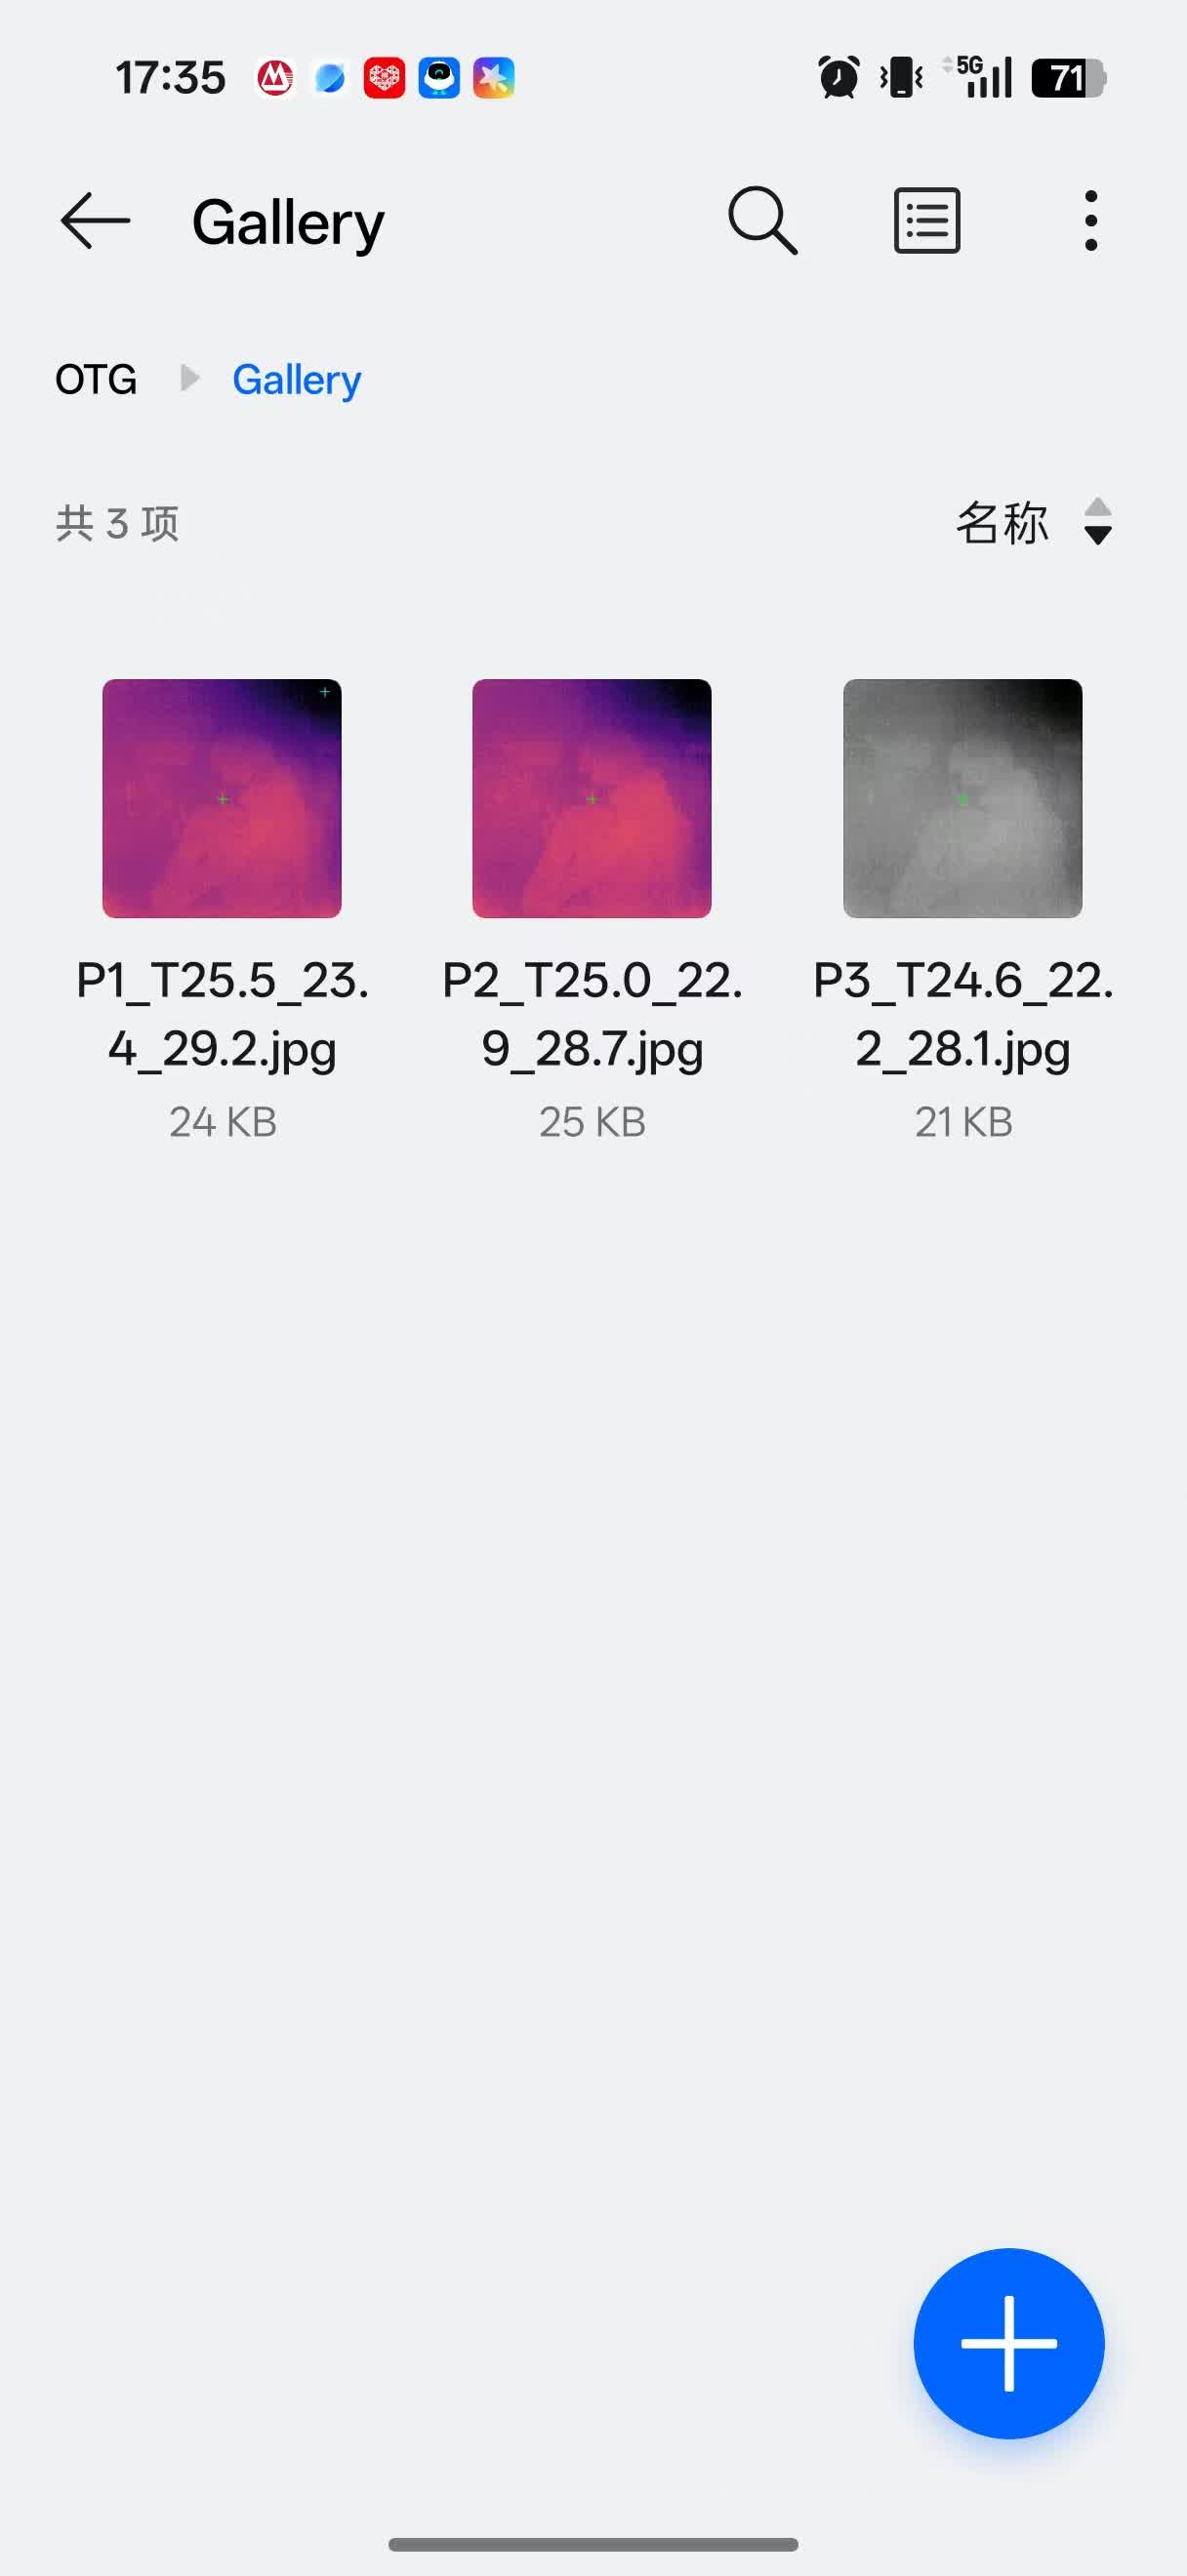
The T256s features 32 MB of internal storage. When connected to a computer via a USB cable, the device mounts as a standard Mass Storage Class (MSC) device, allowing you to access it just like a typical flash drive. Image files are generally located in the /DCIM/ or /Gallery/ directories. If the drive is not recognized, please try using a different data cable or USB port.
Photo Naming Conventions:
- Filename Metadata: Each snapshot includes a temperature summary within its filename, following the format:
P[Index]_T[Center]_L[Min]_H[Max].jpg. - Example:
P001_T32.5_L28.2_H45.6.jpg. This indicates that in the first captured image, the center temperature is 32.5°C, the minimum is 28.2°C, and the maximum is 45.6°C.
Macro Lens Usage Tips
- Gently attach the macro lens to the front of the infrared module. The module is high-precision and fragile; do not apply excessive pressure or scratch the lens.
- Maintain a subject distance of approximately 5cm. Fine-tune the focus by slightly moving the device forward or backward. Note that macro lenses have a very shallow depth of field.
- At macro scales, local temperature gradients are magnified. Environmental fluctuations (like airflow or hand heat) can interfere with readings. Use in a draft-free indoor environment for best results.
Advanced: Y16 Data Parsing Example (Python)
This example demonstrates how to read pixels from a Y16 stream or raw file and convert them to Celsius.
import numpy as np
# Assume raw_array is the 14-bit raw pixel array (uint16) captured from the sensor.
def raw_to_celsius(raw_array):
    # Convert raw 14-bit pixels (uint16) to float and apply formula
    celsius = raw_array.astype(np.float32) / 64.0 - 273.15
    return celsius

# Example: Read a 256x192 raw data frame from a file
raw_data = np.fromfile('frame.raw', dtype=np.uint16).reshape((192, 256))
temp_map = raw_to_celsius(raw_data)
print(f"Center Point Temperature: {temp_map[96, 128]:.2f} °C")
Note: Methods for capturing the Y16 stream depend on your platform (e.g., OpenCV, libuvc, or GStreamer).*
General Precautions
- Warm-up: Allow the device to reach thermal equilibrium (approx. 2 minutes) to minimize thermal drift.
- Emissivity: When measuring low-emissivity objects (like shiny metals), apply electrical tape or matte black paint to the surface. This increases the infrared radiation received by the detector, ensuring accurate data.
- Resource Conflict: UVC devices generally do not support multiple simultaneous connections. Ensure only one application is accessing the camera at a time.
- iOS Support: Currently unavailable due to Apple's UVC device whitelisting mechanism.